Once appointments are created, you can now assign these to care workers through weekly planner. We call this process scheduling.
Scheduling appointments is consist of two steps, 1. Load & Save appointment, and 2. Publish weekly planner. Only when it's published, it becomes official schedule that care workers can attend.
Please check the steps below.
<Video>
<Article>
1. Save & Load appointments
A. Go to the week that you would like to schedule appointments of by using arrows. On the left side bar, both repeat & once off appointments will show, if there was a preferred care worker selected when appointment was created, their name will be listed as well. 
B. Open save/load appt’s tab and click “load”. This will load and move all the appointments to the default preferred care workers on the calendar view.
C. There still might be some pending appointments on left hand bar as they don't have preferred care worker selected. Allocate them to suitable care workers using drop down bar and select "GO"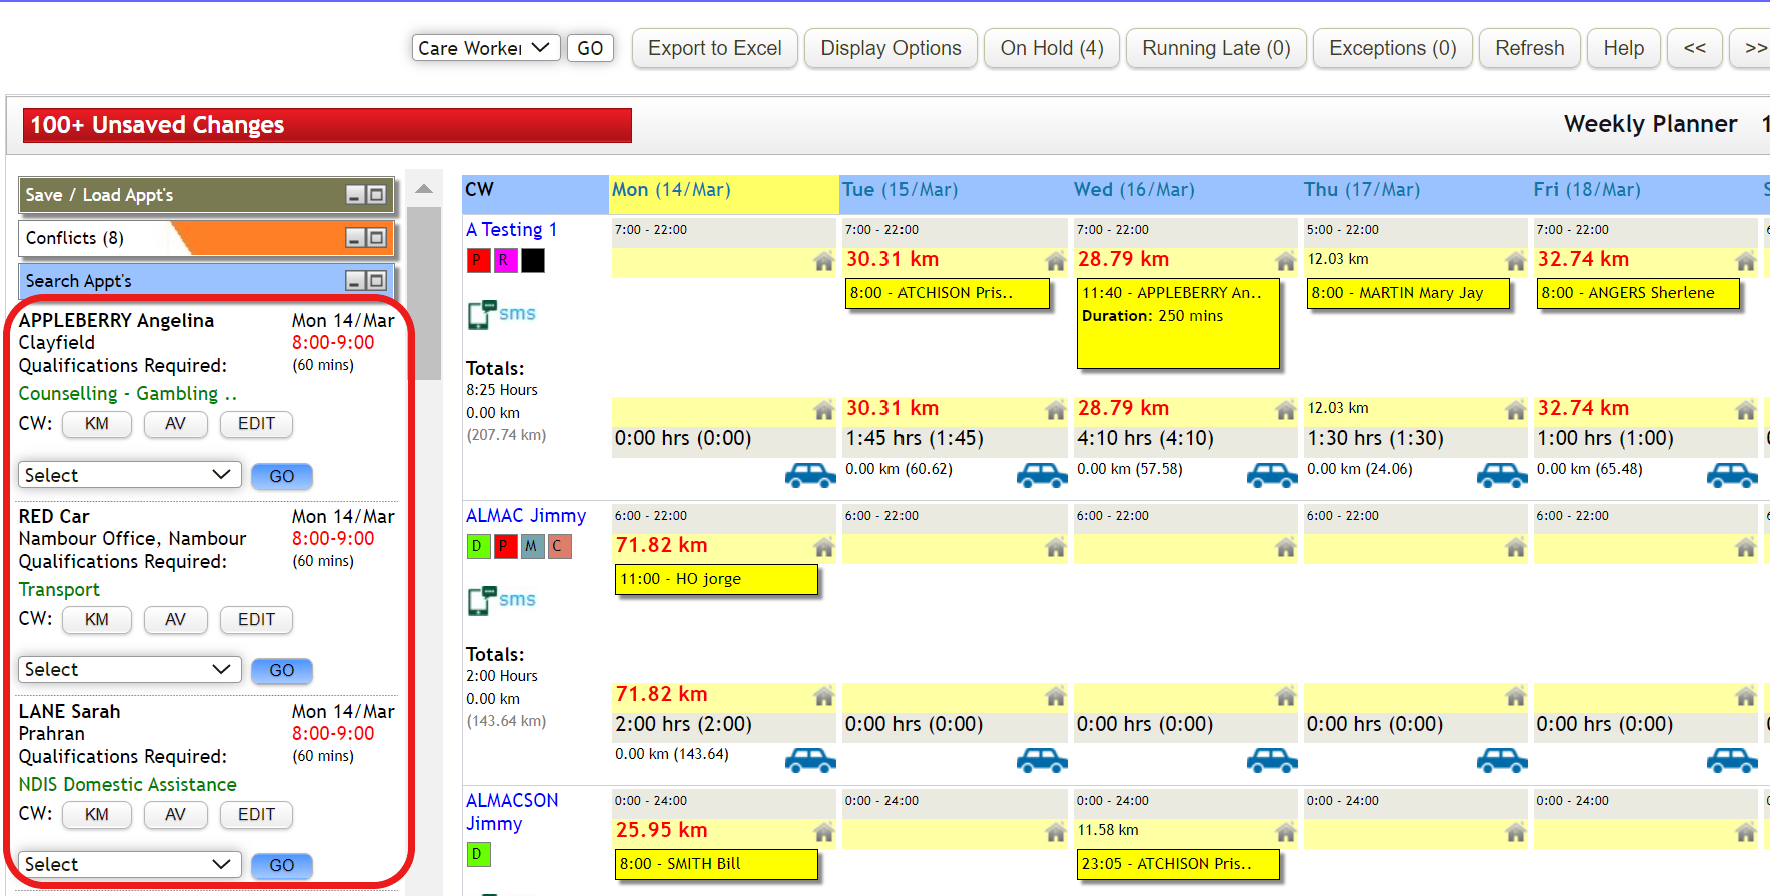
It is recommended to save regularly as you are editing so you don't lost any data. Remember, saving is not publishing.
2. Publish the weekly planner
A. To publish, update the date next to “publish” under “Save/load appts”. This date is the last day of the period to be published, and it is desirable to set it to be Sunday as Sunday is the ending week of roster week.
B. Click "Save"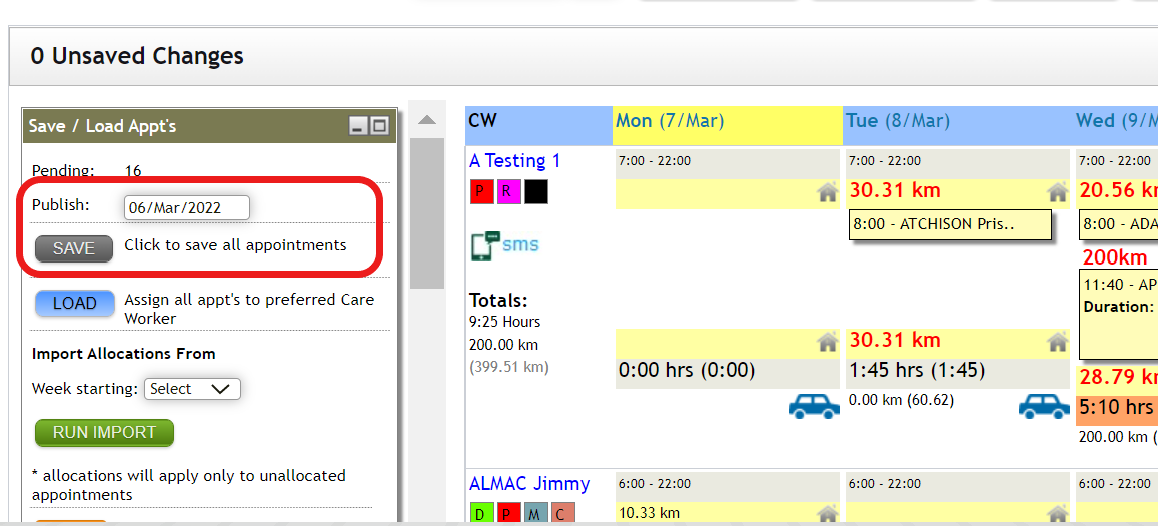
Even after publishing schedule, you can still make changes, and this change will be notified to the care workers.
Comments
0 comments
Please sign in to leave a comment.